Enabling WP Super Cache for WordPress on Windows Hosting
PHP on Windows Server is gaining great popularity thanks to Windows Hosts that support PHP like us (Applied Innovations), the work Microsoft and Zend are doing together to make PHP even faster on Windows and the large number of PHP developers that realize Apache represents only a piece of the total website/ webserver market out there and want to really expand their market.
A few months ago I had enabled WP-cache on my site but in order to get it running I needed to make numerous tweaks. WP-SuperCache actually offers many more abilities over wp-cache and it supports Windows by default from install (well, almost).
Why install caching on your WordPress blog (or any blog)
WordPress dynamically generates your pages for you by making calls to the MySQL database server. If your site suddenly sees a HUGE increase in traffic or popularity it’s possible that the MySQL database server you’re using won’t be able to handle the traffic load. What would cause this to happen? Well, one could only be so lucky. Typically if your blog is posted on a site like digg.com or slashdot.org or hey maybe CNN.com even. Chances are your shared MySQL database server isn’t going to be able to handle the load and before long you’ll find either the server crashes or the hosting provider shuts down your DB to allow the other sites on the server to remain online. Not good.
Caching applications like wp-supercache, cache these dynamic requests as static content on your site and pull the content from that static cache instead of making each page that’s called get generated dynamically. Static content can be served EXTREMELY FAST in IIS compared to dynamic content and puts almost no load on the webserver. So by serving static content and limiting the calls to the database server you’re improving the site speed, lowering the load on the server and increasing the number of simultaneous site visitors your blog can handle.
Warning to the faint of heart.
NOTE: Before we go any further it’s important to understand that when we first install this plug-in it’s going to break our blog. We’re going to need to edit one line on one file to fix this. If for some reason after you install this plug-in if you need to manually uninstall it and aren’t able to access the admin interface here’s how to do that:
- Delete the entire folder wp-supercache in the folder wp-content/plugins in your blog directory.
- Delete the files advanced-cache.php and wp-cache-config.php in the folder wp-content in your blog directory.
Once you delete these files and folders the plug-in should be disabled. Go into the plugins menu and verify it’s removed and not listed there.
Remember, this has worked for me on 6 different installs of WordPress 2.7 on Windows 2003 and 2008 based servers but the configuration at Applied Innovations may be different than your host’s configuration.
You make these changes at your own risk and are solely responsible for anything you break.
How to install WP-SuperCache
Within the WordPress Dashboard you’ll select the Plugins option on the left

This will bring up the Manage Plugins page and expand the plugins options in the menu. From here we’ll select ‘Add new’

This will bring up the Install Plugins page with a search box at the top. For term we’ll type “super cache” and click the search button:

The search will run and list several plugins. We’ll select “WP Super Cache’” which as of this writing was at version 0.9 and we’ll click the install link.

This will bring up a pop up and we’ll click the install button to automatically install this plug-in.
Once the plug-in is installed we’re going to activate it but before we do that I need to warn you, that we may start getting errors on our blog. The reason we activate it and enable these errors is that activating the plug-in creates a file we need to edit in order to remove these errors. Without first activating (and/or enabling the plug-in) these files won’t be created and we’re not able to edit them to proceed.
So go ahead and activate it now but understand we’re going to get errors.
Activating the plug-in & editing it for Windows

When we activated this plug-in we probably got an error like this:
Warning: include(D:\Domains\domain.net\wwwroot/wp-contentD:/Domains/domainnet/wwwroot/wp-content/plugins/wp-super-cache/wp-cache-base.php) [function.include]: failed to open stream: Invalid argument in D:\Domains\domain.net\wwwroot\wp-content\plugins\wp-super-cache\wp-cache.php on line 49
Warning: include() [function.include]: Failed opening ‘D:\Domains\domain.net\wwwroot/wp-contentD:/Domains/domain.net/wwwroot/wp-content/plugins/wp-super-cache/wp-cache-base.php’ for inclusion (include_path=’.;C:\php5\pear’) in D:\Domains\domain.net\wwwroot\wp-content\plugins\wp-super-cache\wp-cache.php on line 49
As you recall I said that I had found this plug-in works “almost” out of the box on Windows. I believe each host has a different PHP configuration and at Applied Innovations you have to make a slight tweak to allow this app to work.
NOTE: If for some reason these files don’t exist for you yet. skip ahead and turn on the caching and then open the site again in your FTP client to edit the files. Remember if you need to completely disable this plug-in just delete the folder wp-supercache in wp-content/plugins. If you delete these files and it still doesn’t load you may need to delete the files advanced-cache.php and wp-cache-config.php in the wp-content folder as well.
Open your FTP client and download the file in wwwroot/(yourblogfolder)/wp-content/wp-cache-config.php
and edit the line like this (it should be line #7):
define( ‘WPCACHEHOME’, WP_CONTENT_DIR . "D:/Domains/YOURDOMAIN/wwwroot/wp-content/plugins/wp-super-cache/" ); //Added by WP-Cache Manager
to this:
define( ‘WPCACHEHOME’, "D:/Domains/YOURDOMAIN/wwwroot/wp-content/plugins/wp-super-cache/" ); //Added by WP-Cache Manager
Basically remove the “WP_CACHE_DIR .” portion and reupload the file.
So once we clean this up the paths we should get no more errors displayed.
Enabling WP Super Cache now that we’ve edited it.
From here click on settings and then WP Super Cache to bring up the Super Cache settings menu

Now we’re going to turn on the cache feature:

and click the update status button. WP Super Cache should now be enabled and you should now be caching your dynamic pages as static pages.
Verify caching is enabled.
Now we need to make sure our site loads and is caching. Go to your site in a browser and make sure the page comes up. Hit refresh after it first comes up and it should load faster. Do this on a few different pages and then click “view source” in your browser on one of your pages and scroll to the bottom you should see a couple lines like this at the very bottom:
<!– Dynamic Page Served (once) in 0.429 seconds –>
<!– Cached page generated by WP-Super-Cache on 2009-02-10 12:45:34 –>
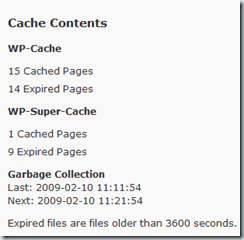
You can go back into the WP Super Cache Settings and you’ll see stats on your cached content:

We’re all cached up!
So there you have it. We’ve enabled caching on your site. This article is a work in progress and may be updated or followed up from time to time. Any questions or problems though feel free to comment.
2 Replies to “Enabling WP Super Cache for WordPress on Windows Hosting”